
- Home
- Products
- Hot
- About Us
- Services
- Industry
- Contact
Views: 0 Author: Site Editor Publish Time: 2026-08-22 Origin: Site


Noticing oil downstream poses an immediate threat to your daily operations. It causes pneumatic tool failure. It spoils finished products. It halts entire production lines abruptly. Oil-injected rotary screw compressors naturally use oil. They require it for internal sealing and heat cooling. However, discovering liquid oil in the air lines is alarming. It indicates a severe failure in the system's separation mechanisms. You must address this problem right away.
This article provides a methodical, evidence-based diagnostic framework. You will learn how to isolate the root cause of oil carryover in compressed air. We will help you minimize factory downtime. You can then make informed repair versus upgrade decisions. By following these practical steps, you protect your critical equipment and maintain peak operational efficiency.
Ignoring oil in your air lines creates massive hidden expenses. You might not see the damage immediately. Eventually, it destroys downstream equipment completely. For instance, oil coats the delicate pores of desiccant beads inside air dryers. This ruins their ability to adsorb moisture. You will then face sticky, clogged pneumatic valves. Rubber seals inside your pipework will degrade and leak rapidly. These compounding failures disrupt production schedules. Addressing compressor oil carryover early prevents these expensive breakdowns.
Quality and compliance risks are equally severe for many businesses. Numerous modern facilities require strict ISO 8573-1 air purity standards. Food packaging plants rely on incredibly clean air to move goods. Pharmaceutical manufacturers cannot tolerate any oil contamination near their pill-coating machines. Precision machining centers need dry, oil-free air for perfect paint finishes. A minor oil leak can trigger massive external compliance audits. It might even force a total product recall.
You need clear success criteria for your troubleshooting efforts. A successful resolution restores carryover rates to the original OEM baseline. This baseline is typically 2 to 3 parts per million (ppm). You must also stabilize pressure drops across the entire piping system. Finally, your chosen fix must prevent the issue from recurring next season.
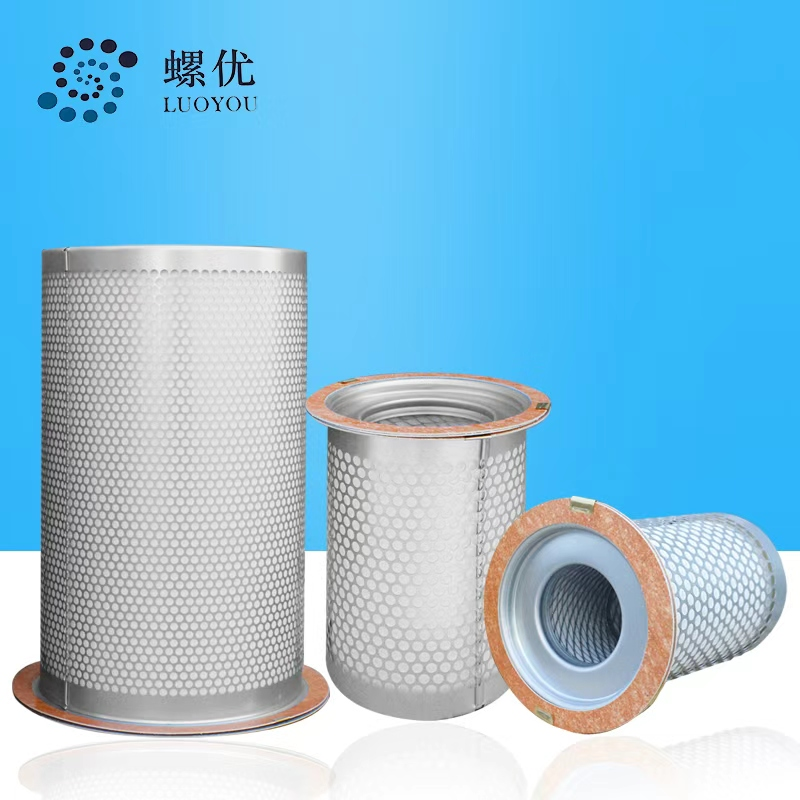
How does a mechanical separator actually work? The separator filter strips microscopic oil mist from the air. This happens just before the compressed air exits the compressor package. The system uses specialized fiberglass media. This woven media coalesces tiny oil droplets into much larger drops. These heavy larger drops then fall back into the sump reservoir below.
Measuring the pressure drop across this filter is absolutely critical. You must check the separator pressure differential (Delta P) regularly. Mechanics usually read this value directly from the main controller panel. Sometimes you must measure it manually using physical gauges. A differential above OEM thresholds indicates heavy saturation. This threshold typically sits around 10 to 15 PSI. High Delta P means the element is blocked by dirt or degraded oil.
Sometimes, the filter suffers a catastrophic structural failure. You must watch for specific symptoms of a collapsed separator. In these rare cases, the differential pressure might read artificially low. However, the downstream oil volume becomes massive almost instantly. The media tears open under extreme pressure. It offers no resistance to the airflow. The air simply bypasses the filtration layers completely. This is a classic sign of severe air-oil separator failure.
Be very cautious when sourcing replacement parts. Aftermarket separators often use inferior, loosely packed filtration media. They usually have significantly shorter lifespans. They can easily collapse under heavy industrial operating loads. This causes unexpected failures compared to genuine OEM parts. Transparency regarding filter media quality is crucial for reliable operations.
Many operators blame the separator element first. Yet, the scavenge line often causes the actual problem. The scavenge line acts as a vital return path. It pulls coalesced oil from the separator bottom back to the airend. You must inspect this small tube and its sight glass. A blocked internal orifice stops the oil flow entirely. A stuck one-way check valve has the exact same effect. Oil then pools rapidly inside the separator element. The high-velocity air simply blows this accumulated liquid directly downstream.
Sump fluid levels also dictate overall system health. Routine maintenance sometimes leads to overfilling the oil reservoir. Well-meaning mechanics might add too much fluid by mistake. High fluid levels cause violent splashing inside the tank. The churning liquid physically overwhelms the separation media above it. This physically forces raw liquid into the air stream. Always check your levels only when the machine is off.
Thermal dynamics play a massive role in unexpected carryover. High ambient summer temperatures stress the compressor cooling system. A failing external cooler allows internal temperatures to spike dangerously. Hot conditions vaporize the synthetic liquid lubricant. Oil vapor passes right through standard mechanical separator media. It travels into the cooler downstream facility pipes. There, it condenses back into troublesome liquid oil.
Finally, examine your chosen lubricant viscosity. You must never use non-approved or highly degraded lubricants. Old oil loses its vital anti-foaming chemical additives. It foams up rapidly inside the sump tank. This lightweight foam easily bypasses standard separation layers. Always stick to OEM-approved synthetic fluids to prevent foaming.
Maintenance teams need a highly reliable, repeatable diagnostic process. Guesswork leads to wasted parts and prolonged facility downtime. We highly recommend implementing the following five-step workflow.
Diagnostic Workflow Summary Chart
| Step | Focus Area | Common Symptoms | Action Required |
|---|---|---|---|
| 1 | Safety & Isolation | Machine running, pressurized | Lock out power, vent all pressure completely. |
| 2 | Fluid Levels | Sight glass shows overfilled tank | Drain excess oil to reach the middle green zone. |
| 3 | Scavenge Line | Oil pooling inside separator | Clean orifice, test check valve flow direction. |
| 4 | Separator & MPV | High Delta P, massive downstream oil | Replace collapsed separator, rebuild stuck MPV. |
| 5 | Temperature | Frequent high-temp alarms, hot ambient air | Clean cooler fins, check fan motor operation. |
Once you find the root cause, you must fix it properly. Immediate remediation requires smart, informed decision-making. Sometimes a simple oil-and-filter change is completely sufficient. This approach works if the oil is slightly old but still visually clean. However, severe thermal degradation requires a deep system flush. Hard varnish buildup demands special cleaning chemicals. You must remove all internal sludge before adding fresh synthetic lubricant.
Next, evaluate your downstream mechanical defenses. Many modern plants install coalescing filters near their most critical equipment. These specialized filters remove trace liquids very effectively. We must offer a balanced claim here. Coalescing filters will protect downstream equipment reliably. However, they will not solve the root cause of upstream compressor failures. They serve as a safety failsafe mechanism. They are definitely not a true mechanical fix for a broken compressor.
Vendor shortlisting logic matters immensely during repairs. Look carefully at available replacement parts. Demand strict OEM media validation from your supplier. Check warranty considerations carefully before buying anything. Ensure the supplier offers rapid local service response times. Cheap, unverified parts always cost more when they break prematurely.
Finally, consider the long-term implementation risks. Purging residual oil from existing distribution piping is incredibly difficult. It often takes weeks for old oil to clear out completely. The compressor might be fixed, but the pipes remain coated. You must install point-of-use drop legs throughout the plant. Add automatic drain valves to catch this residual fluid daily.
Troubleshooting oil in your air lines requires a highly systematic approach. You must move logically from simple visual checks to advanced component testing. Always verify oil levels and operating temperatures first. Then, move on to inspecting the scavenge line and separators. This methodical process prevents unnecessary parts replacement.
Document your machine pressure differential readings today. Compare them directly to the original equipment specifications. Schedule a comprehensive audit with a certified technician if internal diagnostics fail to resolve the issue. Taking immediate, informed action protects your entire facility from costly downtime.
A: Standard lubricated rotary screw compressors typically pass 2 to 3 parts per million (ppm) of oil. This tiny amount is normal and manageable. If you require absolute zero carryover, you must install a completely oil-free compressor system. Mechanical filters cannot achieve true zero carryover.
A: Yes. Oversized compressors often short-cycle. They turn on and off rapidly. This prevents the machine from reaching its optimal operating temperatures. Moisture then condenses inside the tank. This condensate mixes directly into the oil, degrading the fluid and destroying separator efficiency.
A: You must flush the piping thoroughly using approved industrial cleaning solvents. Afterward, you must replace all downstream coalescing filter elements. If oil reached your air dryers, you must change out the saturated desiccant beads completely. Install automatic drains to catch residual oil during the weeks following the repair.


